Summer Gift Wrapping Ideas – Seaside style!

There’s sunshine creeping in through the curtains, the sound of buzzing of the bees and colour is in abundance, yes it must be summer and bringing with it, lots of birthdays and occasions to wrap for.

Summer has simply the most variety when it comes to wrapping themes and colours to use, so if you’ve only ever really thought about getting creative in the winter months, think again… July really is the new December!

From sea blues to tropical sunshine yellows the choice is endless. It’s the season to get vibrant, fun and dare we say it….A bit quirky!  And on that note….

Here’s a few of our own designs to help get your creative juices flowing!  Our theme?  The Great British Seaside! And, as ever….They’re simple to make, using mostly plain gift wrap then decorating with some bits lying around the house (yes even the Grandchildrens toy box wasn’t safe!…Bad Grandma!) …Oh and of course a dash of More Pretty Things style!

icecream5starfish stackBlue presie with pink bow and shellshells and pink velvet ribbonBlue presie with seagul

Please feel to replicate or do your own thing and don’t forget to link to us so we can see what you’ve been up to, we’d love to know.  For instagram & facebook add @moreprettythingsgiftwrapping or on twitter just add @expertwrapping

And as always if you know someone who’d like our blog ….Share, share, share the summer wrapping love by clicking the button below (after the annoying adverts)!

http://www.moreprettythings.co.uk

How to make a Pretty Summer Table Decoration

With summer finally here and alfresco dining in full swing, here’s a quick and easy idea to brighten up any table using some bits and bobs in the house, a dash of creativity and some More Pretty Things know how!

For this make you’ll need:   A jam jar, 2 napkins (we’ve used 2 sizes, the patterned one is from tesco and the plain one from ikea), a piece of ribbon (or string), flowers and scissors

materials

Firstly,  Layer up your napkins and place your jar in the centre.

cover jar sq

Then, holding the napkins up on both sides of the jar, begin to pleat them. Do this by gently pulling the napkins up towards you. Start on the front of the right side, then the back of the right side before moving to the front of the left side and then the back of the left side. This will make sure your pleats are more consistent.

pleat jar sq

When you’ve pleated all the way around secure with a ribbon or piece of string and tie into a pretty bow.

tie off sq

And there you have it….Just add flowers of choice (some water of course) and sit back and enjoy the prettiness (with a cuppa and cake…Would be rude not to!!)

flower centre piece

For more tips and ideas on wrapping and crafts as well as other info on our products and services, why not sign up to our E-Newsletter on the home page of our website or come and join us at one of our workshops! 

http://www.moreprettythings.co.uk


And they lived happily ever after!

Do you always take a nicely wrapped gift to a wedding even if you’re giving them money or vouchers too? Being a bit of a traditionalist I must admit ‘I do’.

No matter how small, its all about the thought and celebrating the ‘gift’ of marriage. The day after our wedding my hubby and I sat relaxing with a glass of champagne in our hotel room, reflecting on our amazing wedding day and opening all the cards and gifts from our loved ones. We felt so emotional opening them and feeling all the love 💕 and thought behind them.

We were, after all, opening them together as Mr & Mrs…such a special feeling! As I recall it took us hours (a welcome breather after lots of busy days pre wedding!) and whilst I suspect it might take Meghan and Harry a bit longer to open theirs, they and all the other happy couples out there will undoubtedly appreciate the thought too if you do wrap them up even the littlest of something!

And so we come on to the actual wrapping…Oooh!!  I just so love wrapping for weddings! A luxury feel all the way is my tip (unless you know otherwise) and this doesn’t have to be costly or over the top either.  Satin ribbon, wedding sentiments or the addition of some imitation pearls or diamonds will all give a feel of luxe for that extra special day.

Ah….So there you have it…Just a few ideas to guide you through this years wedding season and one final tip for you…If it’s wrapped with love it’s always going to be the best gift you can give them!

For more information on our wrapping services and workshops please visit us at http://www.moreprettythings.co.uk


Meet the maker – Life behind a creative business

It’s a pretty natural human desire to know more about those around us. Most magazines and media coverage are full to brimming with celebrity gossip and lets be honest, the more normal ‘bad hair day’ images and tales of burning the dinner being the most interesting and endearing as we’ve all been there!

I’m not a big follower of ‘celebrities’ as such but I am incredibly interested to read about other business women, creatives and ‘makers’. There are so many talented people out there and to me, their ‘behind the scenes’ stories are incredibly inspiring.

One of my favourite reads about a ‘maker’ is that of Cath Kidston. Her book, ‘Coming up roses’ comes across as a really honest account of growing a business and riding the ups and downs of being a creative business owner, including tackling self doubt along the way.

Creative talents often have plenty of stories to tell and knowing you don’t have to be  superhuman is a wonderful message to anyone wondering if they have the talent or ability to start a business journey.  No matter how big a brand , how perfectly polished the images we see are, or as wonderful as the products might be, it’s often helpful (and endearing) to know that behind the scenes everything isn’t always as ‘perfect’ as we might think. Workspaces certainly are never quite as tidy and organised as a magazine photo shoot might suggest and even those who seem incredibly confident or who have made the highstreet have had times when they’ve had to battle their own demons when it comes to self confidence.  There’s very few ‘self taught’ creatives and makers I’ve met or read about, including Cath Kidston, who hasn’t at some point in their career suffered from ‘imposter sydrome’!  Sharing these kind of ‘real life’ stories is so important to those on their journey who perhaps without them may feel a failure and give up on their dreams.

Given any opportunity therefore to surround myself with creatives in a similar boat or share my stories for the benefit of anyone else starting out in business and needing a bit of support, I’m all for it!  So when I recently heard about #marchmeetthemaker, an instagram challenge aimed at creatives and makers, giving you the opportunity to tell your business story (day to day for one month) and reveal behind the scenes info people may not know about you, my ears pricked up!

march-meet-the-maker-prompts-2018

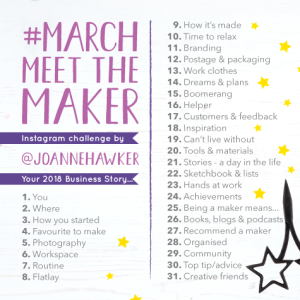
For those not on Instagram or who may have missed it, the idea is you have daily prompts ie Day 1 = ‘You’ , Day 2 = ‘where’ and so on. You then take a pic, video etc, write your post revealing things about yourself/business and add the hashtag #marchmeetthemaker as this allows you to be found more easily.  It was I have to say an incredibly interesting exercise and had I have not taken part, would certainly never have revealed the volume of information about my business to my instagram followers that I did (albeit I didn’t manage the entire month but that was far more about lack of time than transparency!)..Will try harder next time!

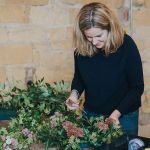
Of course, on the days I did do it, I got to connect with some pretty talented makers and creatives who were doing it too. Some who were completely new to me and others I already knew and now know a whole lot more! And (as it’d be rude not to share) below are some direct links and pretty pics too of just some (sorry just too many to mention) of those amazing talents including the person behind the idea of ‘meet the maker’ and who got us revealing all sorts about ourselves, Joanne Hawker.

For direct links to the above instagram accounts just click here:  Joanne Hawker  ~ Clara and Macy ~ Little Button Bakery  ~ Leafy Couture  ~ Ellies Farm Shop ~ Chris Made This

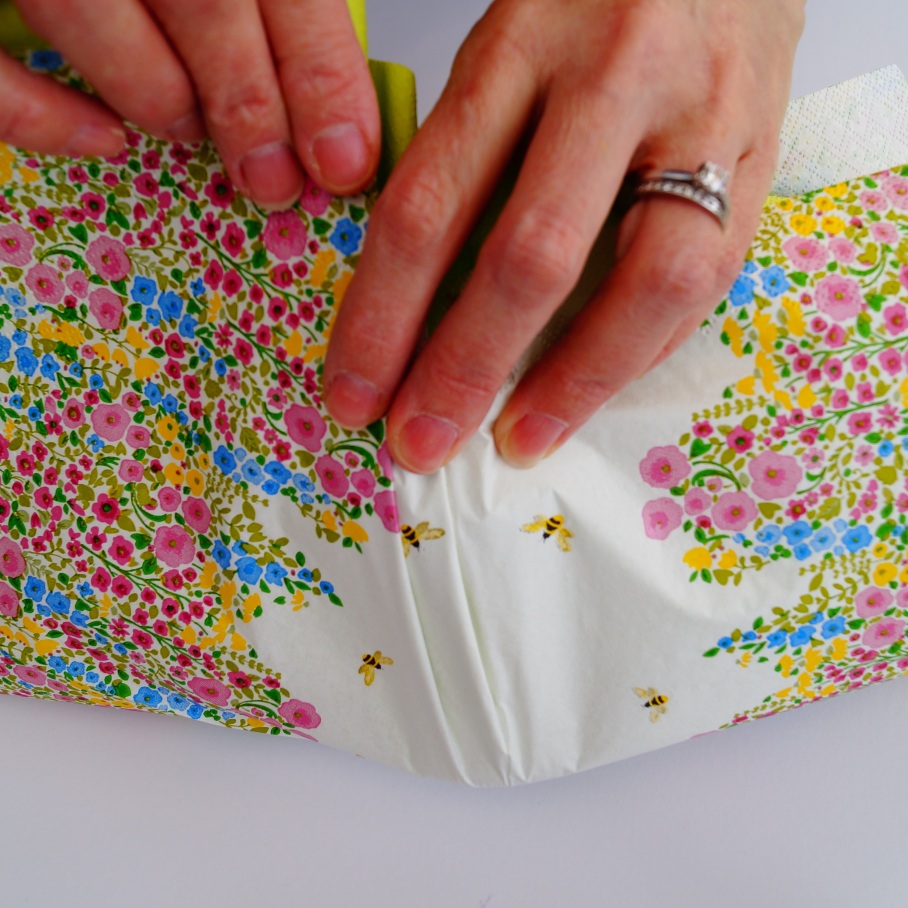
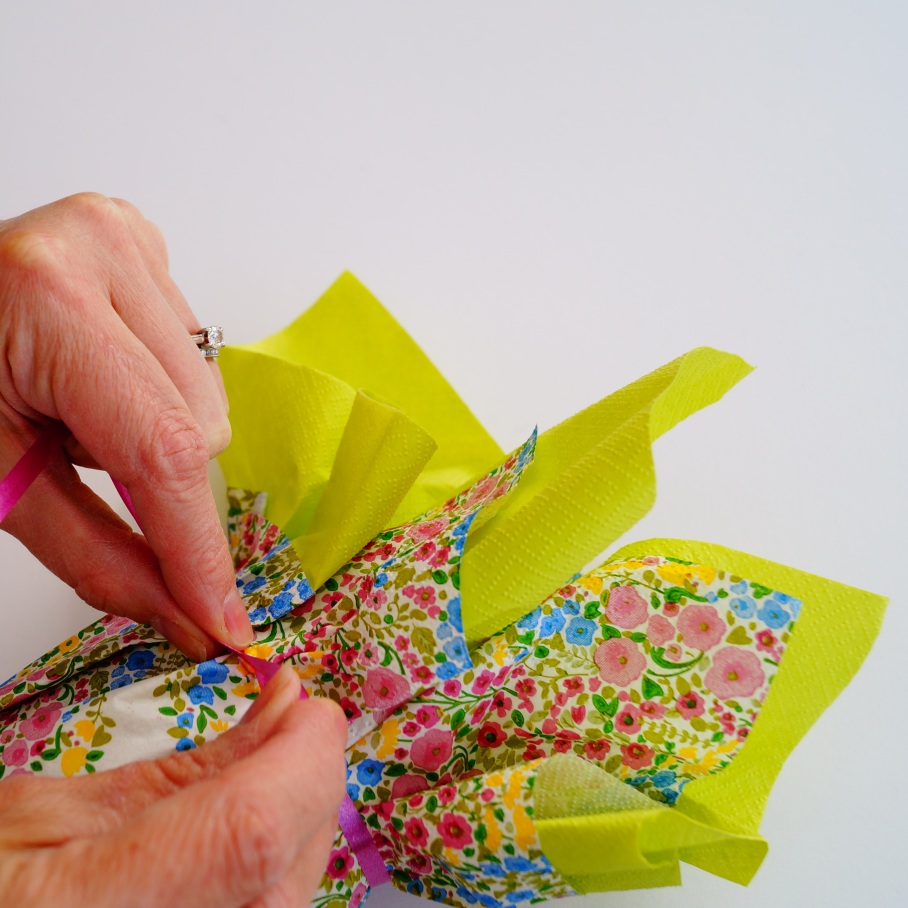
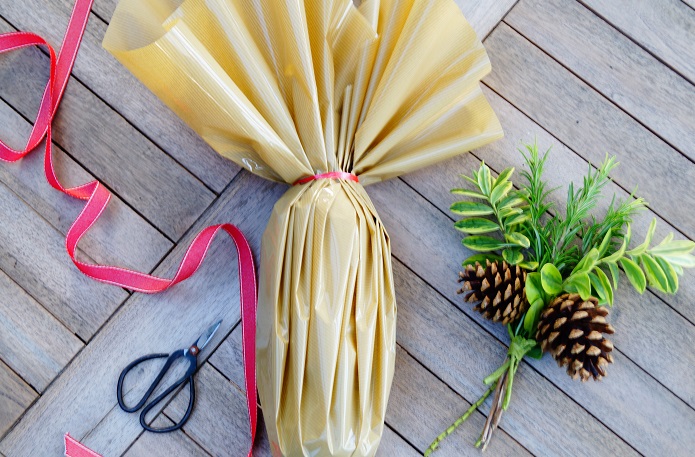
If you’re already on Insta then please do give them a follow and a ‘hello’ and please don’t forget to follow and tag me in too More Pretty Things Gift Wrapping  and then we’ll all be connected!

Of course if you’re not on instagram (yet!) you may be a bit perplexed as to all the talk of it and the hashtags but honestly, it’s not at all complicated and you don’t need to use hashtags unless you want to. If you do need a quick guide to being on there or any help, just get in touch, I’m happy to share with you all I know about it, which happens to be very little but as you can see, this doesn’t prevent me being on there and it being my absolute favourite of all the social media platforms….It’s all those pretty pictures popping up each day that does it!  #loveinstagram  And on that note…Off I go to check if you’ve found us and here’s a few of our recent posts to hopefully tempt you to join us and see what else we’ll be posting!

Know someone who might be interested in our blog post? Please feel free to forward this post or share on social media!

For more information about our Gift Wrapping Workshops and visit http://www.moreprettythings.co.uk and if you’d like to to keep in touch by receiving our E-newsletter then simply pop your email address in the box provided on our home page! 

Quick and Easy Wool Pom Poms!

It’s been some time since the pom pom was ranking top of the craft slot but thanks to a new surge in focus from the fashion and interior design industry, these little sphere’s of retro fluff have been making a well earned come back!

As a child of the 70’s I remember them well, it was the era of pom pom back then! I loved them then and I still do today…And who doesn’t, even Winnie the Pooh likes to ‘tiddly pom pom pom’!  They have such a happy vibe about them and having been taught the skill of making them by my sister all those years ago, I’ve never forgotten it. Over the years (in fashion, or not) I’ve made many a cute ball of fluff which has found itself sewn on the odd scarf or cushion to give it some personality, or created something seasonal with them for the home…Not to mention using them as a decorative touch in wrapping to give some colour or quirkiness to a gift!

These days, with time being so precious though, the old way of making them just isn’t viable for me. For those not so familiar with the technique, it had a rather lengthy process of cutting out cardboard rings and winding wool around until you couldn’t see the middle anymore. So now, I use a perfected shortcut method which I find perfectly suitable for making purely ‘decorative pom poms’ and whilst they may not be quite as robust as the original, they’re so much quicker, meaning I can make mountains of them in just 10 minutes! Oh if only I knew that then (although as kids it did keep us quiet and out of trouble and so i guess it served its purpose!!)

So if you don’t know how to make them or only know the old lengthy way of making them, then do read on and I’ll show you my new quick and easy method…Along with (of course) some of our own decorative ideas on how we’ve use them!

what you'll need

What you’ll need:  Some wool (we’ve just used any we had left over in our craft basket), a piece of cardboard (or you can just use your fingers!) and some sharp scissors…And that’s it!

Step 1)  Start off by winding your chosen wool around a piece of cardboard –  We’ve used a rigid luggage tag (we use various sizes of tag to get different pom pom sizes) but you can use any cardboard or just your fingers if you prefer (works just as well!)

Step 2) Keep winding the wool until you feel it’s sufficient – the amount of wool needed will depend on the size of your cardboard tag and how fluffy you’d like the pom pom to be but certainly you need a fair bit and with practice you’ll get a dab hand at gauging it! Once you’re happy with the amount, remove the wool from the cardboard and secure around the middle with a small piece of wool – Ensure you tie it nice and tight – double knot! (or your wool will simply fall out once it’s cut.)

Step 3)  Cut through all the wool loops (top and bottom) ensuring you don’t cut through the wool you’ve tied it together with. This should leave you with a sort of raggedy pom pom …To get a more rounded version simply trim with scissors as desired!

Ah, and there you have it…A quick and easy pom pom! You now just have to decide what to do with it!

Here’s just a few of our own Springtime favorites and for more pom pom inspiration why not visit us on pinterest!  Click here to go directly to our ‘wool’ inspiration board (or find us at https://www.pinterest.co.uk/lovewrapping

pom pom wreath3

If you enjoyed our blog please do share it with others!  And if you’d like to know more about our craft or wrapping workshops then please visit us at http://www.moreprettythings.co.uk

Last minute Valentines Wrapping Tip!

Got some last minute wrapping to do this Valentines but have run out of wrapping paper or simply forgotten to get some?  No worries…We have the answer!

Our top tip? Napkins!  They’re a great material to use in wrapping (particularly awkward shapes as they are more pliable than usual wrapping paper) and so whether you’ve already bought some napkins for tonights romantic meal or you’ve some oddments stashed in a kitchen drawer from times gone by, this handy alternative to paper will see you through your last minute wrapping needs… Phew!

chocs and materials to wrap it

Take your chosen napkin and lay it out in front of you. Pop the object you wish to wrap in the centre (ours being some gorgeous Hotel Chocolat melting hearts) and bring your napkin together a pleat at a time until the object is covered!  Tie with some co-ordinating ribbon (or string !), add a tag and there we go, a beautifully wrapping gift, quicker than you can say ‘Be my Valentine’….well nearly!   Happy Valentines everyone.

napkin-hack-2-resized.jpg

Like our top tips?  Please feel free to share with others!  And…For more great tips, wrapping ideas and information about our workshops please visit our website at http://www.moreprettythings.co.uk

How to make a Seed Heart Bird Feeder

Baby it’s cold outside! February can be a really harsh month, with biting winds and ice even on the brightest of days and so if you’re feeling the cold in all those layers, just think of all the wildlife braving it outside, day and night!

So as Valentines day approaches, we thought we’d spread the love to all those little birdies out there with these really super, easy to make and nutritious (for birds ONLY you understand!) Seed Heart Bird Feeders.

Now we do warn you, they are a bit messy to make but it’s well worth it and don’t worry if you don’t have heart shaped cookie cutters in the cupboard, other shapes work just as well . (Unless it’s like a big eagle shape…or a scarecrow…Mmmn yes perhaps you might want to avoid them!)  Read on for our ‘how to’ guide and…Enjoy making!

materials

We used:   Approx 275g to 300g of Bird Seed –  250g of Lard (or animal suet if you prefer) – Cookie cutters (or make your own shape from tin foil) –  A Pan –  A Tray  – Tin Foil or Clingfilm – A Spoon – A Skewer (or pencil), Ribbon (or Twine).  Oh you might want to have some soapy water and a towel handy too! (well I did say it might be a bit messy!)

  1. Firstly, preparation is key so line a tray with some clingfilm or tin foil and place your cutters on there ready.
  2. Carefully heat the Lard in a pan until it’s just melted and then remove from the heat. (Note that the lard can be quite hot at this stage so be careful not to burn yourself!) Stir your birdseed into the fat a bit at a time until you feel you’re happy with the consistency of the mixture.  (Don’t worry if you have a small amount of birdseed left over you can always add it in at a later stage). As a general rule you should be able to see approximately a couple of mm of melted lard sitting above the seeds in the pan.
  3. Before you can start to fill your cookie cutters, allow your mixture to cool down by placing it outside or somewhere away from room temperature until it is at a temperature where the Lard begins to go white (but just before it solidifies.)
  4. When the fat has whitened (but you can still stir it), this is the perfect time to fill your shapes with the mixture. (Note that if the liquid has not solidified enough, it will seep out of the bottom of your cutters!). It’s also the best time to decide if you need to add more birdseed. You need just enough lard to hold the seeds together and so if you need to add more, do so now. Then use the spoon to fill the cutters  with the mixture, pushing it down firmly and ensuring you fill any corners or edges well to ensure you take on the shape of the cutter.
  5. Once you’re happy they are filled enough, take a skewer or pencil and form a decent size hole (this will be to thread your ribbon/twine through at a later date).
  6. Next, place them (whilst still in the cookie cutter) in a cool place or fridge until  they’re as solid as they can be….As lard will only go so hard.

Finally….Gently press out the hardened mixture with your fingers (yep that’s the most messy bit!) and thread the Ribbon or Twine through the hole. Hang them in the garden and stand back and admire! (Preferably in the warmth of the house with a nice cup of hot tea whilst humming “feed the birds”) Nice work …Mary Poppins has nothing on you!

2 hearts back garden

Know someone else that may like our blog? Please feel free to share!  And…If you’d like to subscribe to our e-newsletter to receive monthly updates, discounts and information about our workshops it’s easy….Simply visit our website www. moreprettythings.co.uk and pop your email address in the box provided on the homepage.


Recycling Christmas Cards

Every year I receive the most beautiful Christmas cards and the thought of throwing them in a bin (even a recycling one) after someone has spent time, thought and money buying them for me just isn’t something I can bare. So this month we’re bringing you some crafty ways to use or keep them instead!

Firstly how about getting ahead for next Christmas by making some Gift Tags. It really is easy, fun and a great way to use up any bits of ribbon or twine you have lying around too.  There are many styles of tag you can make too, we’ve used a couple of methods…

Some designs lend themselves to a spot of freestyle cutting and this gorgeous Christmas tree is one.

xmas tree card
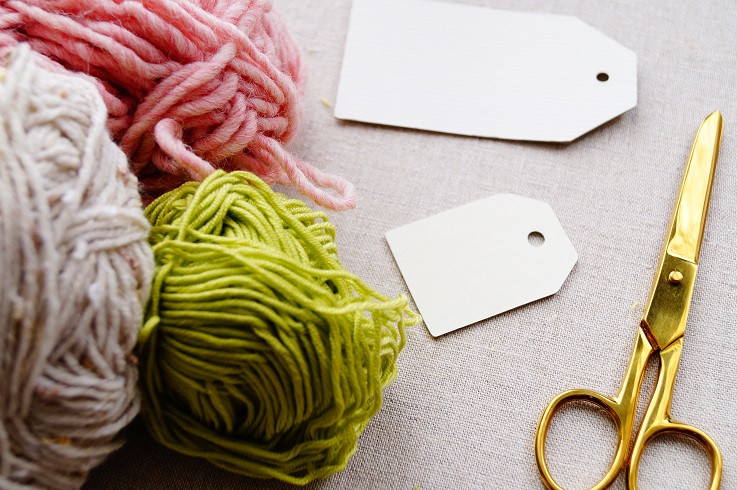
Then there’s the easiest way I know and that’s using a luggage label as a template to draw around the chosen picture and then just follow the lines to cut it out. If you’re not confident in cutting straight then a craft trimmer or guillotine can be most helpful!


picture template

My top tip when making gift tags is to not just look at the front of the card but the back too as there can often be plenty of ‘white space’ and a cute picture you can use ..Like this one!

back of card

And voila…Here’s just a few I made earlier (including the image from the back of the card as shown above!)  Aren’t they just super? A sure winner to saving you time and money next Christmas…Not to mention what a goody two shoes you are for recycling!

labels collection2

If you fancy making something to give as a gift, how about a Christmas bookmark? A nice addition you can add to a stocking or home made Christmas Cracker. Just look for an image on a card that is a good length then cut to size, hole punch the top and add some matching pretty ribbon. How fab is that?!

bookmark2

And finally,  one of my absolute favourite things to do is to frame those cards that I love or that mean something to me and then I bring them out each Christmas, dotting them around the house on book shelves and dressers etc where I can see and enjoy them.  You’d be surprised just how effective this can be. Here’s just a couple of my newest editions from this years received cards…

picture stood up

most wonderful time picture in fram

….There are lots more ideas for recycling your cards but I suspect that might just be plenty to be getting on with for now!

Have fun being creative and don’t forget…If you enjoyed this blog do please ‘pass it on’ by forwarding to a friend or sharing on social media!

Find out about our workshops at http://www.moreprettythings.co.uk and if you’d like us to keep you up to date by receiving our monthly E-newsletter it’s simple to subscribe….Just add your email address to the box provided on the homepage!

Get Crafty with Kraft this Christmas

Bored of doing the same old thing with your gift wrapping and looking for some creative inspiration this Christmas? Then look no further than Kraft paper!

Being plain, Kraft paper is one of the most versatile papers to use. A blank canvas, it can change its look quite dramatically (depending on what you do with it!)

In this months blog we’re going to show you some crafty and creative ways to transform your Kraft paper using just a chalk marker, a few bits an bobs found around the house (or garden) and a little imagination!

Start by wrapping your gifts in kraft paper…Not looking very festive? Don’t panic! What could be more Christmassy than snow? Queue the chalk marker! Generously add lots of white spots over your kraft paper and voila….See how easy was that!

kraft white dot uni and wool

With this super snowy background whatever you now add will be sure to look fabulously festive, so it’s time to be creative and have some fun!   Here’s some we did earlier…!

stag

We simply love the Scandinavian look and it’s so on trend!  We’ve added a wooden decoration and tied it in with some plain white satin ribbon. Ta dah!

bauble coaster side view

Simplicity in itself….We’ve added a red felt coaster (that we got free in a home magazine some time ago) and tied on some matching wool we had in our craft basket. Easy but effective!

DSC02978

Got lots of buttons you don’t know what to do with?  Why not use them to make a cute picture. We’ve added in some wool scarves for colour and used a marker to draw in some detail and complete the picture.  The buttons can then be placed in their final position and securely stuck with double sided tape or glue.


washi tape

Ever wondered what you can do with your Washi tape? Why not recreate a look of bunting with some string and write a festive message! (Well as long as it’s not ‘bah humbug’ that is!)

kraft white ribbon foliage and pine cones

Want a classy look but in a hurry?  Just add some fresh foliage and pine cones then tie with a simple white satin ribbon. 

Merry Christmas and happy wrapping everyone! x

To sign up to our e-newsletter or for more information on our workshops visit http://www.moreprettythings.co.uk


Fabulously Festive Gift Wrapping

In our workshops we not only teach lots of gift wrapping techniques but we also like to reveal our secrets of how to transform something rather plain looking into something stunning by adding simple to make, handmade decorative touches!

So this month we thought we’d share one of our festive favorites with you, just in time for all that Christmas wrapping – This gorgeous Pine Cone and Foliage Corsage!

There are various artificial alternatives you can find in the shops but none that will look quite as stunning  or be as inexpensive to make being that our version involves a spot of scavenging in the garden and surrounding woodland for most of your materials! By using fresh foliage it’ll not just look stunning but (depending on the type of foliage you use) it will smell gorgeous too, filling the air with a beautiful aroma and bringing that festive feeling into your home (and to the person’s you’re giving it to too!)

So here it is…Do have a go! But don’t forget…Foliage will dry out without water so to keep it looking as fresh as possible our tip is to have your gifts wrapped and cones wired up and waiting, then simply add your foliage at the last minute!

What you’ll need:  2 pine cones ,  some foliage  (we’ve used a mix of rosemary and hebe from our garden), wire (£1 for 15 wires) and florist stem tape (£2.50 per roll) both from our More Pretty Things shop.

blog 1a

Gather your pine cones, foliage and materials together.

pine cone wire

Place a wire near the base of the pine cone in between one of the sections and wrap the wire around the cone.

pine cone wire 2

Bring the two ends of the wire together to meet one another and…

pine cone twisting

…Twist! Keep twisting the two wires together and when you near the end, turn the sharp ends of the wire over so that you have a rounded end instead.

pine cone wire stem tape

You now need to cover the wire with stem tape. To do this start at the top, pinch it on and then twist it on to the wire all the way down the stem…

pine cone wire stem tape next

Continue winding stem tape down to the bottom of the stem then fold over and come back up the stem to the top. Repeat with other pine cone.

taking off greenery on rosemary

Take your foliage and remove some of the greenery from the ends to reveal about 2 inches of the stalk.

finished 2

Add your foliage and cones together and secure in the centre with a small amount of stem tape. This will prevent it all from falling apart when attaching it to your gift.

wine wrapped and bits

Take your wrapped gift and using ribbon, tie on your pine cones and foliage corsage.

wrapped bottle

Voila! A fabulously festive wrapped gift ready for giving!

Easy once you know how isn’t it? Know someone else who might like to try it? Please feel free to forward our ‘how to’ with a friend or share on social media.

Happy Festive Wrapping!

For more information on our Gift Wrapping Workshops and Demonstrations please visit our website at http://www.moreprettythings.co.uk .